M A S T E R P A G E
Step 3:
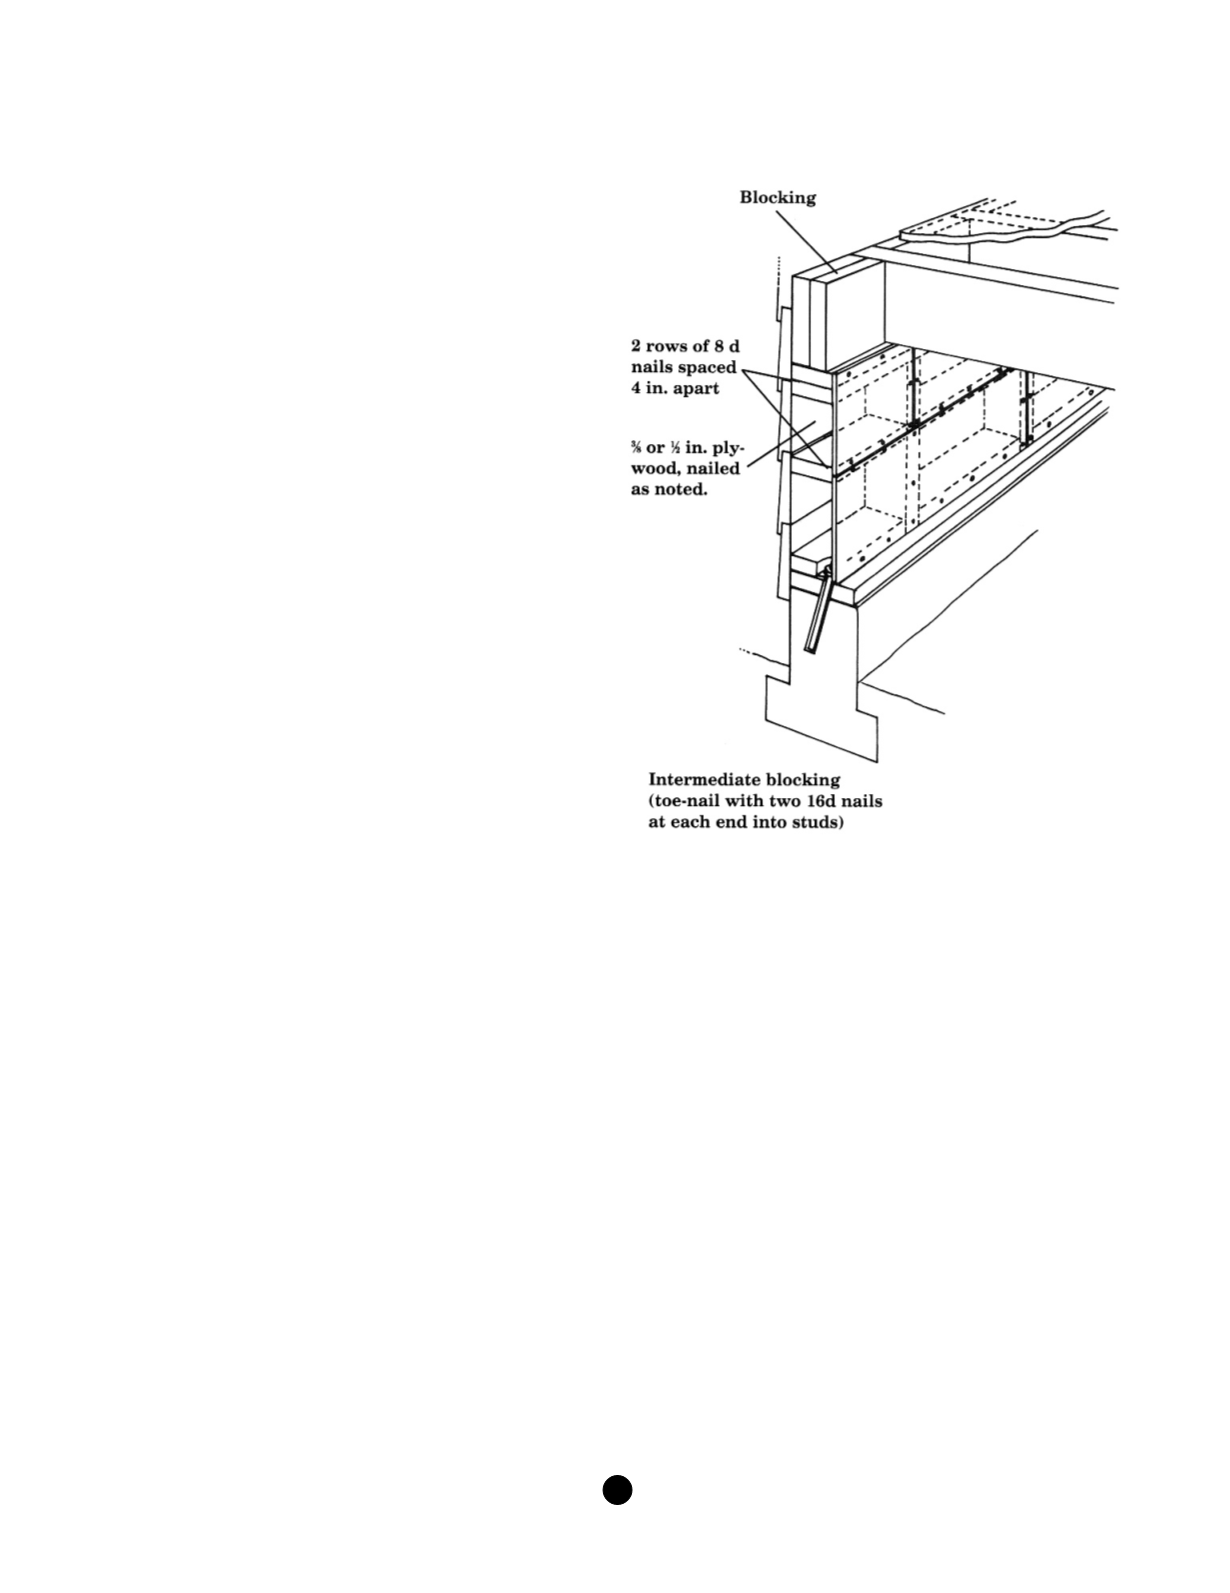
Install Plywood
Materials and Tools Needed
Q
1 cm (3/8 in.) or 1.2 cm (15/32 in.) thick plywood of Structural 1
of CDX grade
Q
Nominal 5 cm (2 in.) thick lumber (actually 4 cm or 1.5 in. thick)
the same depth as the studs. This will be used for blocking, if
required.
Note: The size of access to the average crawl space frequently
doesn’t allow large pieces of plywood. You may need to use two or
more smaller pieces of plywood. When multiple pieces are used to
cover the height of the wall, blocking must be installed at the joint
and completely nailed. If a single piece of plywood can be installed
the full height of the reinforcing wall, blocking will not be necessary.
Q
8d common nails for use with 1 cm (3/8 in.) plywood
Q
10d common nails for use with 1.2 cm (15/32 in.) plywood
Q
16d common nails for use with blocking, if required
Q
Electric circular saw
Q
Electric drill
Q
0.2 cm (1/16 in.) diameter drill bit for pre-drilling nail holes if
blocking is required
Q
Nail gun or carpenter’s hammer
Q
Measuring tape
Q
Chalk, lumber crayon or pencil
Q
4 cm to 5 cm (1.5 in. to 2 in.) diameter hole saw
Installation Instructions for Step 3
1. If access to the crawl space under the house is such that full-width
sheets, or sheets cut to the height of the cripple studs, will not fit, cut
plywood sheets lengthwise to a width not less than 46 cm (18 in.).
2. If sheets need to be cut, blocking will be necessary. Cut the 5 cm (2 in.) nominal thickness lumber to fit snugly between the studs. Nail
each block to the studs with 2 16d nails at each end. Nails should be driven into the side of the stud. Pre-drilling for the nails will make this
operation easier. Blocking should be installed at the same height for the full length of the plywood sheet.
3. Starting at a comer, measure across the studs to find a stud where the sheets of plywood can butt. In order to do this, find the stud closest
to, but not less than 1.2 m (4' ft.) or closest to, but not more than 2.4 m (8 ft.) from the corner. Measure the location of all ventilation vents
and cut out holes in the plywood to match the vents.
4. Mark the location of each stud at the top plate and on the foundation wall with chalk or lumber crayon.
5. After cutting the plywood to fit, lay it up against the studs and hammer a nail in each comer of the plywood to hold it in place. Using a
nail gun, or a carpenter’s hammer, place a nail every 10 cm (4 in.) around the perimeter of the plywood sheet. Then place a nail every 15
cm (6 in.) along each stud. Use the nails appropriate for the thickness of the plywood.
6. Once the plywood has been fully nailed, drill a 4 cm to 5 cm (1.5 in. to 2 in.) diameter hole above and below the blocking.
A G U
/
F E M A
309
S
E I S M I C
S
L E U T H S


