M A S T E R P A G E
Strengthening Your Wood
Frame House:
Four Projects
5.3c
adapted with permission of the Bay Area
Regional Earthquake Preparedness Project
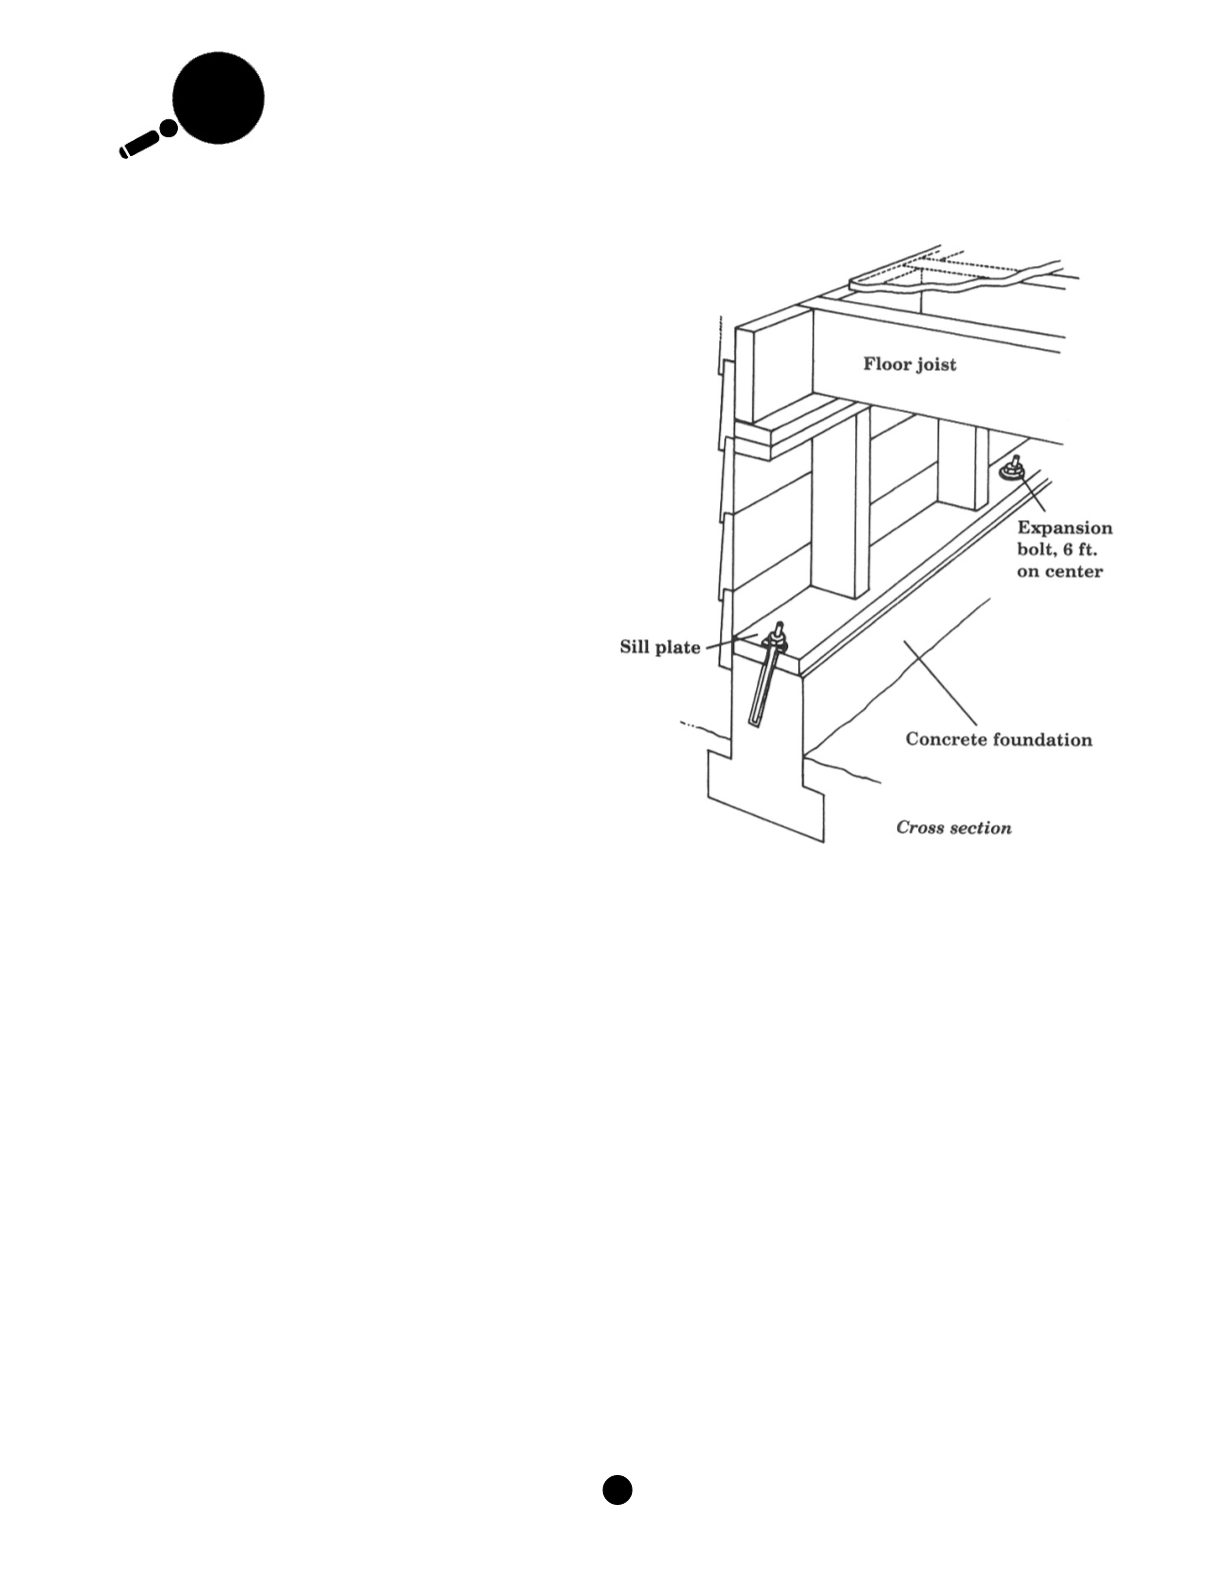
Step 1:
Steel Plate Bolting
Materials and Tools Needed
Q
1 cm (1/2 in.) diameter expansion bolts of a style acceptable to the
local building department. Length of bolt determined by depth of
hole, thickness of sill plate, and a projection of not less than 2.5
cm (1 in.) above sill plate
Q
Masonry drill bit with carbide tip. Size determined by size and
style of expansion bolt.
Q
Electric rotary impact drill or heavy-duty drill
Q
Short-handled sledge hammer or carpenter’s hammer for setting
the bolts.
Q
1 cm (3/8 in.) diameter plastic tubing
Q
Adjustable crescent wrench
Q
Chalk or lumber crayon
Q
Measuring tape
Q
Eye protection
Q
Noise protection
Q
Dust mask
Installation Instructions for Step 1
1. Lay out bolt locations. Bolts should be spaced at not more than 2
m (6 ft) apart. Begin layout at not less than 10 cm (4 in.) or more
than 30 cm (12 in.) from the end of any section of sill plate.
2. Drill holes through the sill plate and into the foundation with a carbide drill bit of the size recommended for the style of expansion bolt
used. Drill holes a minimum of 11.5 cm (4.5 in.) into foundation wall.
3. After drilling a hole, clean out the concrete dust by inserting the plastic tubing into the hole and blowing out the dust.
4. Place a cut washer over the bolt so it rests on top of the sill plate. Place the nut on the bolt and turn until the top of the nut is even with
the top of the bolt. Insert expansion bolt into the hole until it stops. Using the sledge hammer or carpenter’s hammer, strike the top of the
hole.
5. Using a crescent wrench, tighten the nut until the sill plate begins to crush under the washer.
A G U
/
F E M A
307
S
E I S M I C
S
L E U T H S


