B. Procedure
l. Give each group a copy of Master 2.2c, Reading the Patterns, and a
pair of scissors. Give these instructions:
a. Cut the reversal pattern off the bottom of the sheet and trim away
everything outside the dotted outline.
b. Cut the reversal pattern along the dashed horizontal line in the
center to form two strips. Place the two strips together with the
patterned bands facing in, making sure that the arrows on both strips
face the same way. Tape ends together.
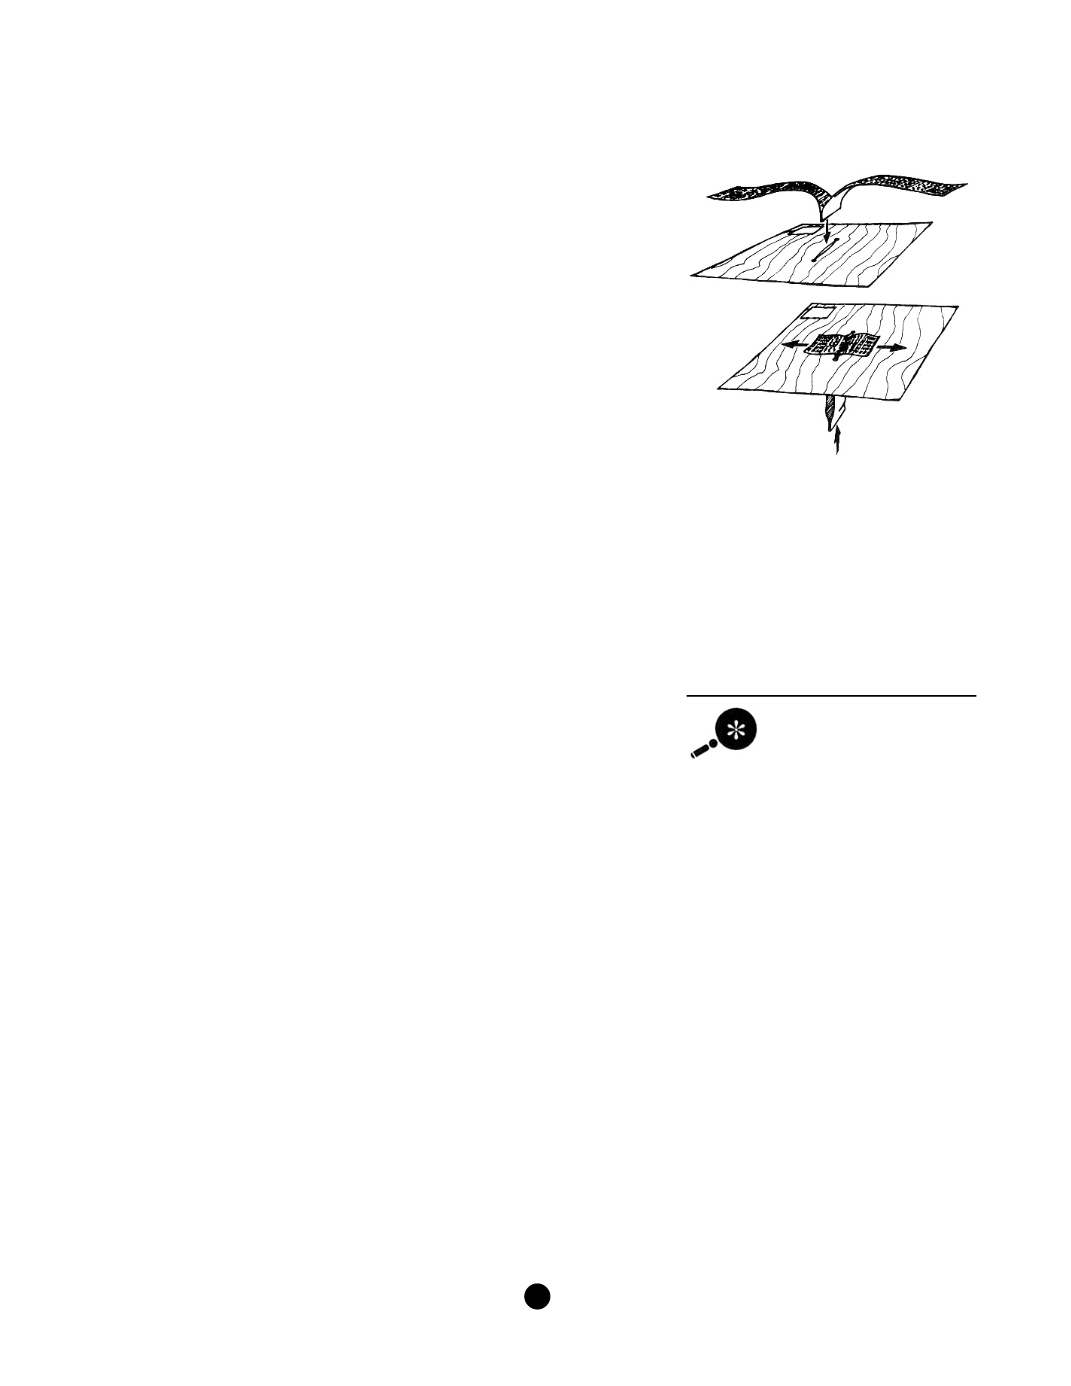
c. Insert the scissors at one of the black dots on the map and carefully
cut a slit along the axis of the mid-ocean ridge, following the broken
line between the two dots. Insert the open end of the folded reversal
pattern into the slit from underneath, holding onto the stub, and
carefully pull the first several centimeters of paper through (up to the
first dark line). Crease the strip along the dark line so the first pattern
is showing, bend it flush with the paper on one side of the ridge, and
label it with a 1 in red ink. Do the same thing on the other side of the
ridge.
Tell students that this represents a volcanic eruption during which the
rocks adopt the magnetic field of the Earth at that time. Then,
announce that a reversal of the poles has occurred.
TEACHING CLUES AND CUES
d. Pull up the second pattern on the strip, bend it over, and label it 2.
Repeat with the other side. Continue this process until all the patterns
have been pulled up and labeled.
2. When all the bands have been labeled, ask students:
There should be nine
bands on each side of
the ridge.
Q
What does each fold of paper represent as it is pulled up from
below? (new rock being erupted from inside the Earth by volcanic
action)
Q
Which pattern represents the oldest volcanic rock? (Number 1)
Q
Is the pattern of the reversals and the ages mirrored on the two sides
of the ridge? (Yes.)
Q
Why do the pattern bands vary in width? (Their width is deter-
mined by how much volcanic activity occurred before the reversal
and how long the reversal of polarity lasted.)
Q
Can you tell which way the poles were oriented during any given
age on your model? (Yes.)
C. Conclusion
Conduct a quick drill to be sure students understand how the models
show what direction the poles were oriented in. Call out a number and
ask students to answer with a direction. Go on until students can
respond rapidly.
A G U
/
F E M A
49
S
E I S M I C
S
L E U T H S


