c. Tape the seven remaining strips of 120-grit sandpaper into one long
strip. (Be sure to use tape only on the back of the sandpaper.) Now
attach the sandpaper lengthwise down the center of the pine board,
using two thumbtacks at each end and being sure the sandpaper is
drawn tight.
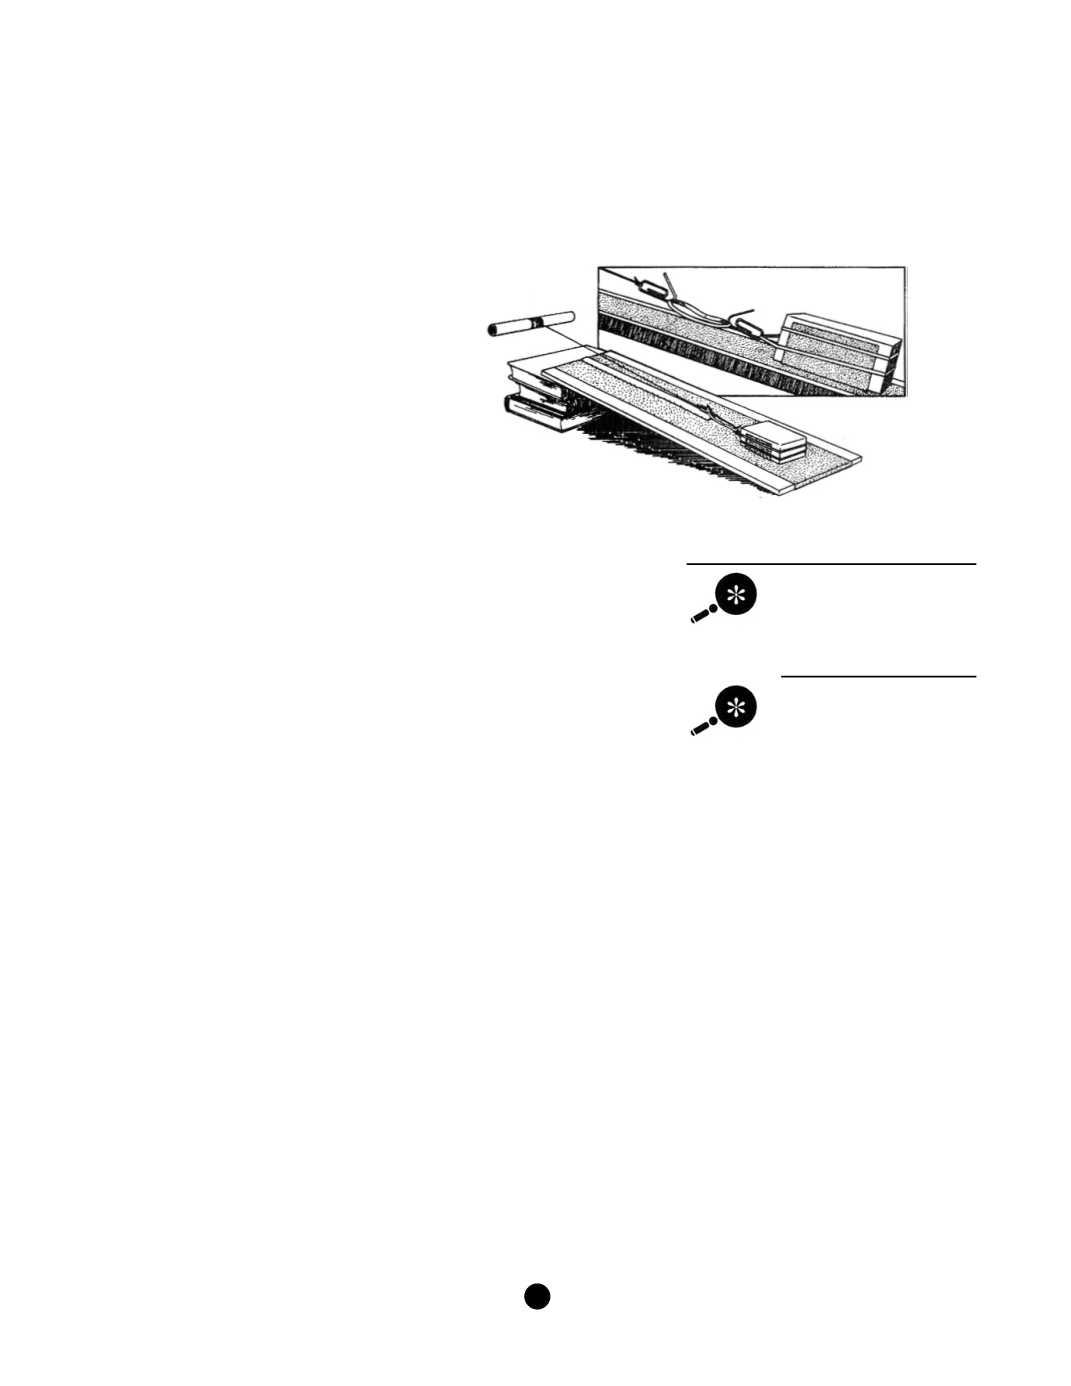
d. Attach one paper clip to one of the rubber
bands around the box.
e. Tie one end of the string onto another paper
clip and place a mark on the string about 1 cm
from the clip. Use one rubber band to join the
paper clip on the box with the paper clip on the
string. Tie the free end of the string around the
dowel or paper towel roll.
f. Tape the meter stick onto the sandpaper strip on
the board.
TEACHING CLUES AND CUES
This part of the activity
requires a very steady
hand.
Controlling the tension
on the string works best
if the string is rolled onto
the dowel until the dowel
g. Position the box at one end of the board so it is centered on the
sandpaper. Use books to raise the other end of the board
approximately 10 cm (4 in.). Measure and record the height.
h. Gently roll the string onto the dowel until the string lifts off the
paper and becomes taut. Note the location of the mark on the string
relative to the meter stick. Take care to keep the dowel in the same
position during rolling and measurement.
i. Continue to roll the string onto the dowel until the box moves. The
box should move with a quick, jumping motion. Record the new
location of the mark on the string (the distance the box moved) on the
data table. Continue rolling up the string and recording jump distance
until the box hits the meter stick. The meter stick can be pulled
upwards to allow the box to continue to be pulled.
j. Subtract the beginning measurement from the ending measurement
or add up the jump measurements to find out how far the box moved.
Divide by the number of jumps to calculate an average jump distance.
3. Instruct other students in the same group to change one variable,
repeat the procedure, and average the distance of the jumps. Students
may vary the model by adding one or more rubber bands, adding more
books to change the angle of the board, substituting the brick for the
box, or using sandpaper of a different grit. If time allows, give every
student a chance to operate the model with each of the variations.
4. Ask students to complete their data sheets.
C. Conclusion
Ask the class:
rests on the books and is against the
edge of the board.
Q
What might the different variables represent in terms of earthquakes
and landscape conditions? (Number of rubber bands—different
amounts of energy released; angle of the board—steepness of the
fault; sandpaper grit size—differences in the amount of force
A G U
/
F E M A
41
S
E I S M I C
S
L E U T H S


