Q
Poster board or chart paper, markers, and audiovisual equipment as
available
Q
Video camera (
optional
)
P ROC E DUR E
Teacher Preparation
Read the teacher background information on tsunami. Locate some
before and after photos of tsunami, and either make transparencies or
have them available to pass around the room.
TEACHING CLUES & CUES
Check your school and community libraries for the periodicals listed at
the end of this lesson and in the Unit Resources. Also look for beginning
oceanography textbooks and back issues of
Scientific American
.
You may want to review
scientific notation before
handling the large
numbers in this activity.
A. Introduction
If you have photos, share them with the class. Then pass out copies of
Master 2.4g, Tsunami Event Reports. Have students take turn reading
the accounts aloud. Ask students what they think causes tsunami.
B. Lesson Development
1. To provide the students with some common language, pass out
Master 2.4h, the Seismic Sea Wave Activity Sheet, and help the class
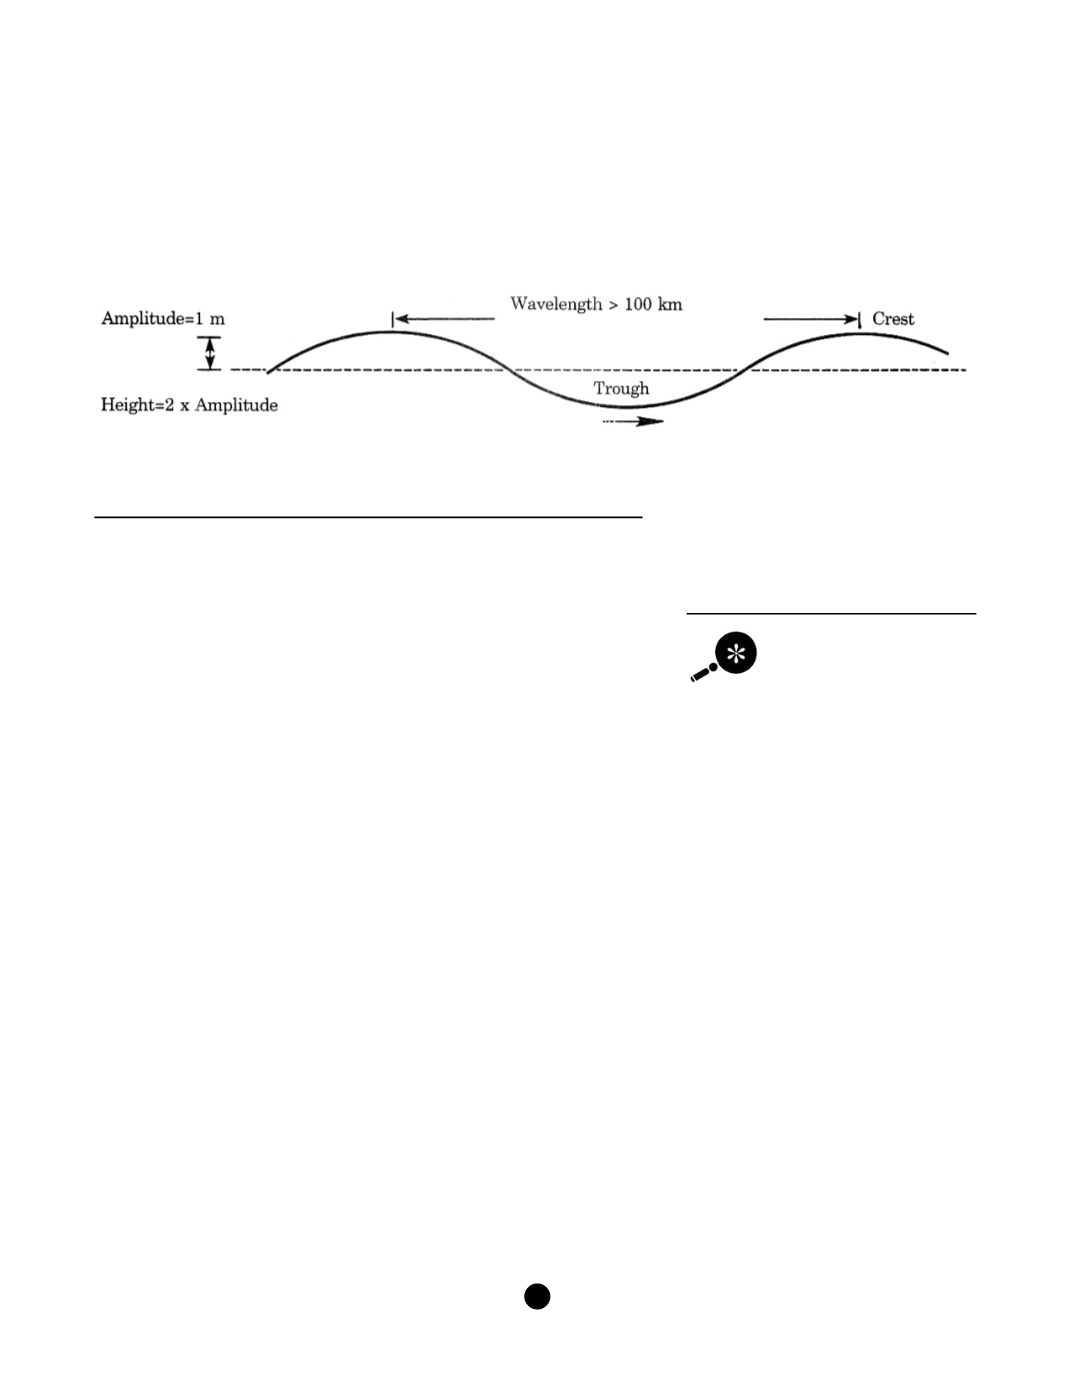
work through it. Project the upper half of Master 2.4i, Wave
Characteristics and Energy. Ask students to tell you what belongs in
each blank, and label the wave form accordingly. Point out that waves
never stand still, so we have to be very clever to measure their
characteristics.
2. Pose this question: How can a fault movement of only one meter in
the depths of the ocean cause a huge wave to strike land? Promote
student discussion until someone mentions the energy involved. At
that point, project the lower half of Master 2.4i, and show students
how the uplift of one meter actually involves lifting a column of water
the same size as the area of seafloor uplifted.
3. Pass out copies of Master 2.4j, Seismic Sea Waves Energy
Analysis. Work through the activity as a class or have students
complete the worksheets in pairs, depending on their previous
preparation.
A G U
/
F E M A
97
S
E I S M I C
S
L E U T H S


